Multipurpose rooms work best when every zone has a clear job, traffic paths stay open, and furniture can adapt as needs change. The goal isn’t to squeeze everything in—it’s to make the room feel easy to use on a regular day, then simple to switch into “expanded mode” for guests, projects, workouts, or family nights. Below is a practical layout process—measure, map, zone, and refine—plus a printable checklist that keeps decisions simple and repeatable.
Before moving furniture, get clear on what the space must do. Multipurpose layouts fall apart when low-use activities take the best real estate or when daily access points get blocked.
If the room is part of a main escape route, keep pathways straightforward and avoid creating dead ends. The NFPA’s guidance on home escape planning is a helpful reminder that clear movement isn’t just about convenience.
Circulation is the “hidden structure” of a functional room. Protect it first, then build zones around it.
| Area | Minimum clearance to plan for | Notes |
|---|---|---|
| Main walkway | 30–36 in (76–91 cm) | Wider feels better in family spaces or near entries |
| Behind dining/work chair | 30 in (76 cm) | Add more if the chair is used often and the path is a route |
| In front of drawers/closets | 36 in (91 cm) | Prevents daily bottlenecks |
| Between sofa and coffee table | 16–18 in (41–46 cm) | Adjust for ottomans or recliners |
| Bed side access (one side) | 24–30 in (61–76 cm) | Use the wider end for daily sleepers |
For accessibility-friendly spacing ideas (especially if mobility needs change over time), the ADA National Network’s home design resources can be a practical reference point.
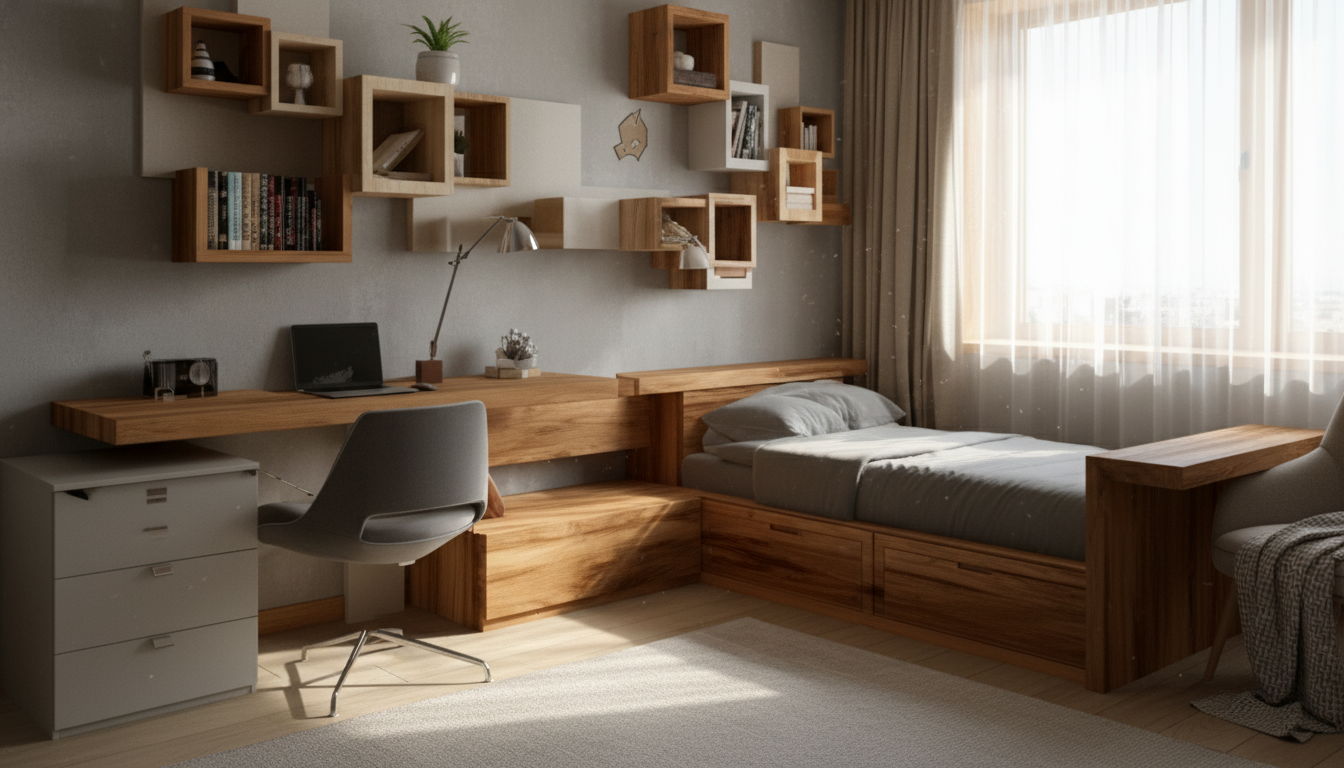
Zoning makes a mixed-use room feel designed rather than improvised. The trick is to define boundaries without chopping up the space or blocking light.
A simple rule that keeps rooms calm: each zone should answer one question. “Where do I work?” “Where do I unwind?” “Where do guest linens live?” When the answer is obvious, the room is easier to maintain.
Multipurpose rooms need pieces that do more than one job—or that disappear when they’re not needed.
If one of your main functions is a home office zone, small upgrades matter. A reliable mouse can reduce friction in daily use, especially in tighter desk setups. Consider pairing your layout plan with a simple desk refresh like the RGB Wireless Gaming Mouse for Mac and PC to keep the work zone comfortable and consistent.
Even a well-zoned room won’t feel functional if lighting is harsh, dim, or poorly placed—or if every outlet is already claimed.
For practical, cost-conscious lighting choices, the U.S. Department of Energy’s overview of energy-saving lighting options can help you choose bulbs and fixtures that suit both mood and task needs.
For a ready-to-print version that walks through the process and helps you document both layouts, see Mastering Multipurpose Room Layouts – Printable Checklist (Digital Download).
Most rooms feel best with 2–3 primary functions, with one “dominant” daily use that gets the easiest setup. Convertible furniture and vertical storage let secondary functions exist without taking over the floor plan.
Use rugs, lighting, and furniture orientation first, then add open dividers like bookcases or curtains if needed. Keeping sightlines open—especially near windows—helps the room feel larger and less chopped up.
Create a reset routine: labeled bins, a dedicated parking spot for foldables, and a “default layout” sketch so everything has a home. When cleanup is mostly putting items back into assigned storage, resets take minutes instead of hours.


Leave a comment